



 Contact


Spare remote controller BENINCA HAPPY.2VA Orange - 100% replacement for original remote controller.
It is intended for these models BENINCA: BILL4024M, BULL.5M, BULL424ESA, BULL5M, BULL624TURBO, HEADY, JIM4, JM.3, KBIL40M.P, KBOB21M, KBULL8M.P, KIT, KMS.5P, KPONY.P, MB24/MBE24, ONE.2WB. (There may not be listed all compatible models. If you are not sure, just tell us your device model (by online chat, email), we will promptly check, verify if compatible with your device. The verified compatibility is guaranteed by us.)
- It is a fully-fledged spare remote controller, shown on the left (It is not „universal“).
- The remote controller is guaranteed for 2 years.
You will receive a remote controller ready to use. The only thing you have to do is register the remote controller to control unit of engine/drive.
CONTROL FOR OLD AND NEW CODING (old and new drives).
4-channel remote control, 433.92 MHz, with Advanced Rolling Code (ARC 128 bit) and Rolling Code (HCS 64 bit).
Refined and elegant design made of high-quality materials with a refined finish. The scratch-resistant front plastics feature a dual finish and a metal perimeter frame with an option for attaching to a key ring.
ARC coding guarantees maximum security thanks to the length of the transmitted code (128 bit) and the high number of possible combinations. The remote control is factory-set to ARC coding, but it can be used to change the coding to Rolling Code or mixed coding (ARC and Rolling Code).
To adjust the code type:
- Press and hold the X and ✓ buttons simultaneously.
- After approximately 3 seconds, the LED will start flashing; the number of flashes indicates the currently selected code:
- 3 flashes + 1-second pause = ARC mode
- 4 flashes + 1-second pause = ARC + HCS* mode
- 2 flashes + 1-second pause = HCS mode
- When the buttons are held down for longer (approx. 20 seconds), the LED will light up continuously for 3 seconds. Releasing the buttons during these 3 seconds switches the transmitter to the next mode (3 >> 4 >> 2 >> 3 >> 4 >> ...).
If the X and ✓ buttons are released while the LED is not lit continuously, the configuration will not change.
*In this mode, the keys on the left (▲ and X) are coded with ARC, while the keys on the right (✓ and ▼) use HCS.
Process of registering remote controller to main unit:
Procedure for registering a remote control in a control unit WITH A DISPLAY:
Next to the display there are 3 buttons/micro switches: + / OK / -
- Briefly press the OK button (max. 2 seconds); the display will light up and show various messages
- Use the + or - buttons to select the command on the display: RADIO / rAdi / rAd (one of these three versions will be shown)
- Confirm the program by briefly pressing the OK button
- The message PP will appear on the display; confirm the function again by briefly pressing OK
- The display will now guide you - PUSh = press and hold the button you want to register in the control unit's memory
- When OK appears on the display, the remote control has been successfully registered *
- Repeat the procedure from step 7 until the display switches off
Procedure for registering a remote control in a control unit WITHOUT A DISPLAY:
- Remove the unit cover.
- Find the programming button (PGM) on the main board. Press and hold this button for >2 seconds - the LED will light up and remain lit.
- Within 10 seconds, briefly press the button on the remote control being registered for approximately >3 seconds.
- The unit will flash to confirm that the remote control has been stored in memory.
- Wait approximately 30 seconds and test the remote control.
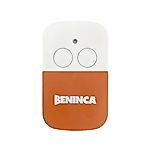









Spare remote controller BENINCA HAPPY.2VA Orange - 100% replacement for original remote controller.
It is intended for these models BENINCA: BILL4024M, BULL.5M, BULL424ESA, BULL5M, BULL624TURBO, HEADY, JIM4, JM.3, KBIL40M.P, KBOB21M, KBULL8M.P, KIT, KMS.5P, KPONY.P, MB24/MBE24, ONE.2WB. (There may not be listed all compatible models. If you are not sure, just tell us your device model (by online chat, email), we will promptly check, verify if compatible with your device. The verified compatibility is guaranteed by us.)
- It is a fully-fledged spare remote controller, shown on the left (It is not „universal“).
- The remote controller is guaranteed for 2 years.
You will receive a remote controller ready to use. The only thing you have to do is register the remote controller to control unit of engine/drive.
CONTROL FOR OLD AND NEW CODING (old and new drives).
4-channel remote control, 433.92 MHz, with Advanced Rolling Code (ARC 128 bit) and Rolling Code (HCS 64 bit).
Refined and elegant design made of high-quality materials with a refined finish. The scratch-resistant front plastics feature a dual finish and a metal perimeter frame with an option for attaching to a key ring.
ARC coding guarantees maximum security thanks to the length of the transmitted code (128 bit) and the high number of possible combinations. The remote control is factory-set to ARC coding, but it can be used to change the coding to Rolling Code or mixed coding (ARC and Rolling Code).
To adjust the code type:
- Press and hold the X and ✓ buttons simultaneously.
- After approximately 3 seconds, the LED will start flashing; the number of flashes indicates the currently selected code:
- 3 flashes + 1-second pause = ARC mode
- 4 flashes + 1-second pause = ARC + HCS* mode
- 2 flashes + 1-second pause = HCS mode
- When the buttons are held down for longer (approx. 20 seconds), the LED will light up continuously for 3 seconds. Releasing the buttons during these 3 seconds switches the transmitter to the next mode (3 >> 4 >> 2 >> 3 >> 4 >> ...).
If the X and ✓ buttons are released while the LED is not lit continuously, the configuration will not change.
*In this mode, the keys on the left (▲ and X) are coded with ARC, while the keys on the right (✓ and ▼) use HCS.
Process of registering remote controller to main unit:
Procedure for registering a remote control in a control unit WITH A DISPLAY:
Next to the display there are 3 buttons/micro switches: + / OK / -
- Briefly press the OK button (max. 2 seconds); the display will light up and show various messages
- Use the + or - buttons to select the command on the display: RADIO / rAdi / rAd (one of these three versions will be shown)
- Confirm the program by briefly pressing the OK button
- The message PP will appear on the display; confirm the function again by briefly pressing OK
- The display will now guide you - PUSh = press and hold the button you want to register in the control unit's memory
- When OK appears on the display, the remote control has been successfully registered *
- Repeat the procedure from step 7 until the display switches off
Procedure for registering a remote control in a control unit WITHOUT A DISPLAY:
- Remove the unit cover.
- Find the programming button (PGM) on the main board. Press and hold this button for >2 seconds - the LED will light up and remain lit.
- Within 10 seconds, briefly press the button on the remote control being registered for approximately >3 seconds.
- The unit will flash to confirm that the remote control has been stored in memory.
- Wait approximately 30 seconds and test the remote control.






Featured Products
Radio range extender for remote control IR signal integrated in the battery - UFON 433 MHz
General DUREMOTE 2 tailor made remote control with button printing on demand
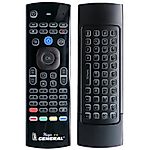
General MAGIC - remote control for SMART TV with keyboard and air-mouse function

Share your device's brand and model, and we'll handle the rest. Our experts will handle the request and your tailored recommendations will be on their way via email.

